
 Tweet
Tweet
You can store a bootable copy of macOS on a USB stick, making it easy to install the OS on other Macs
Unlike its Windows counterpart, macOS Sonoma is available to all Mac users for free. So, as long as you have one of the compatible Mac models, you can install the operating system without buying or activating a license. This simplifies matters for users, as anyone could theoretically boot the operating system on supported hardware. Furthermore, it makes it easier to deploy the operating system on multiple Macs consecutively by relying on a bootable USB macOS installer. To create one, follow the steps we’ve listed in this guide.
Prerequisites for creating a bootable USB macOS installer
To create a bootable USB macOS installer, you will need the following:
- A USB flash drive with at least 14GB of available storage.
- The complete macOS installer files:
How to create a bootable USB macOS installer
Once you’ve prepared a USB flash drive with sufficient space and downloaded the desired macOS version’s files using the links above, follow these steps:
- Format the USB flash drive by plugging it into your Mac and following the steps listed in the dedicated guide. Instead of opting for the ExFAT format, however, leave it as the default Mac OS Extended. Note that this process will delete all the data on your USB flash drive, so make sure any important data is backed up beforehand.
- Launch the built-in Terminal app on your Mac.
- Paste one of the following commands based on the macOS version’s files you’ve downloaded:
- For macOS Sonoma: sudo /Applications/Install macOS Sonoma.app/Contents/Resources/createinstallmedia –volume /Volumes/MyVolume
- For macOS Ventura: sudo /Applications/Install macOS Ventura.app/Contents/Resources/createinstallmedia –volume /Volumes/MyVolume
- For macOS Monterey: sudo /Applications/Install macOS Monterey.app/Contents/Resources/createinstallmedia –volume /Volumes/MyVolume
- For macOS Big Sur: sudo /Applications/Install macOS Big Sur.app/Contents/Resources/createinstallmedia –volume /Volumes/MyVolume
- Replace the MyVolume bit at the end of the command with the actual name of your volume.
- Hit the Return button on your keyboard.
- You will eventually be prompted to enter your password. Type the password you typically enter to unlock your Mac. (Terminal won’t show the password as you type it, not even asterisks.)
- Hit the Return button when you’re done typing your password.
- At some point, Terminal will request to erase the volume. Hit the Y button to confirm.
- It may then request permission to access files on the removable volume. Grant it by clicking the OK button.
- Terminal will then proceed with the process. When it’s done, an alert will indicate so, and you can then exit Terminal and eject the volume.

Source: Apple
How to use the bootable installer on a Mac
Once you’ve completed the steps above, you will have a bootable USB macOS installer. To actually use it:
- Plug it into the internet-connected Mac you would like to update or restore.
- Turn on your Mac, and continue holding the Power button until the startup options are viewable, which should list your bootable volumes.
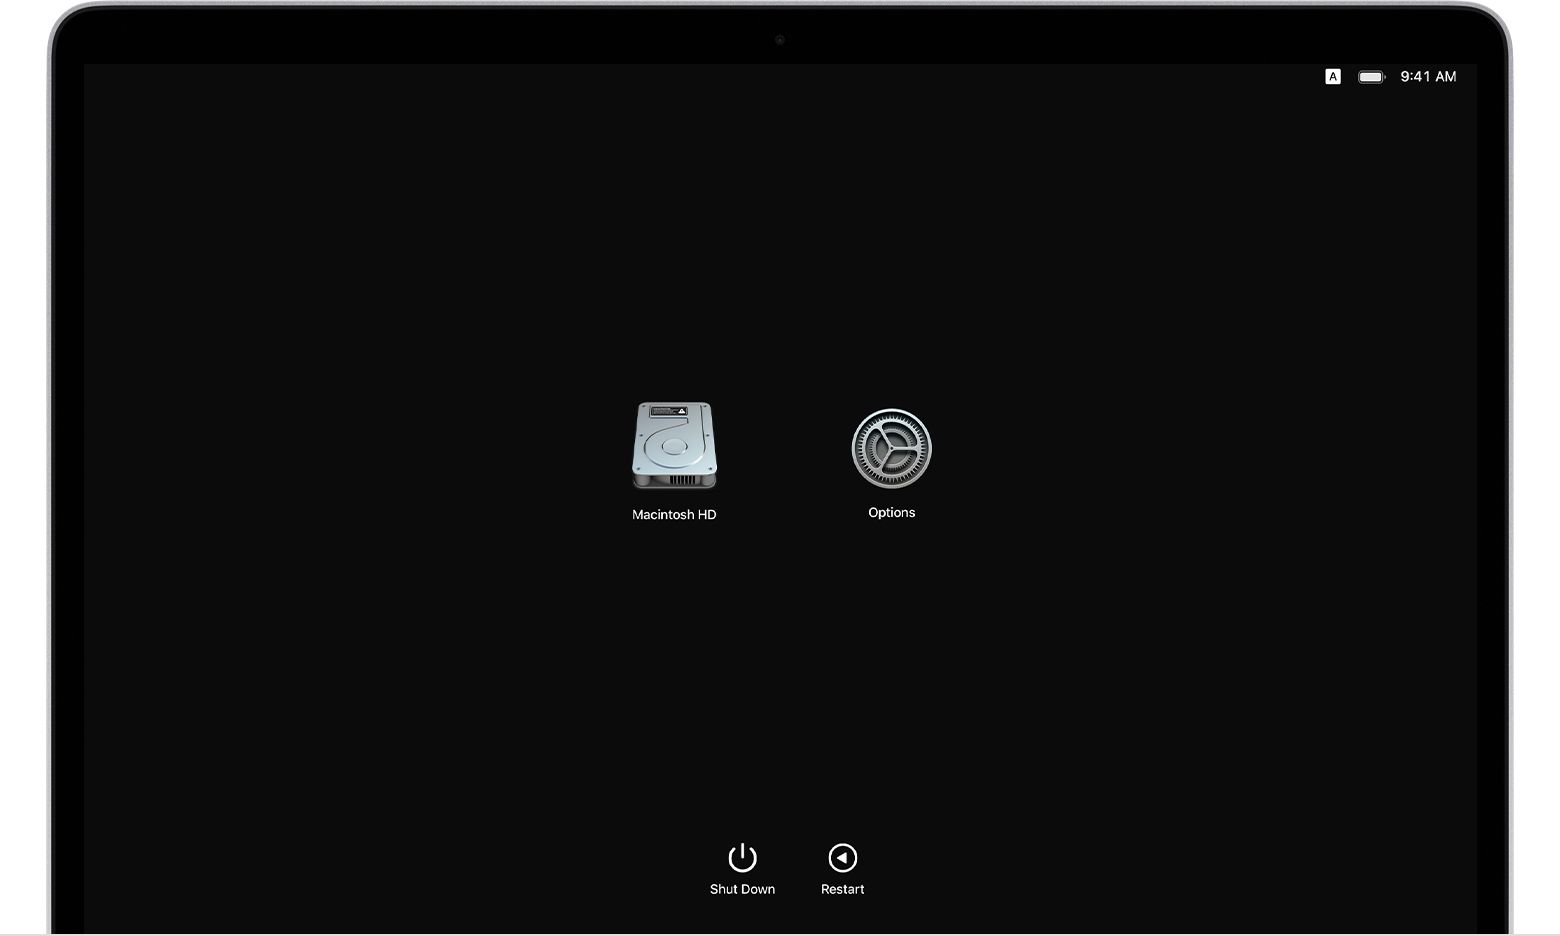
Source: Apple - Select the one you just created in the previous section of this guide.
- macOS will then provide you with basic, on-screen instructions that you will have to follow.
- That’s it! The chosen macOS version should now be running on the Mac.
A bootable USB macOS installer is quite handy
Creating a bootable USB macOS installer is great for when you want to install the same OS versions on multiple Macs. Instead of downloading several gigabytes worth of updates over and over again, you can just download it once, set up the bootable USB macOS installer, and then plug into each Mac you want to install it on.
While the Mac on which you’re installing the update still needs to be connected to the internet, it’s only for build verification and other similar purposes. It won’t actually download any large files, as the OS resources are provided by the USB flash drive. So, you can now go ahead and update your Macs one after the other while skipping the time they’d typically take to download the OS.
** (Disclaimer: This video content is intended for educational and informational purposes only) **
More...
