
 Tweet
Tweet
One of the best things about Sony’s PlayStation 5 is that it comes with a blazing fast SSD that cuts down on things like installation and loading times. The only problem, however, is that it’s just 825GB, and only about 660GB of it can be used for storing games and other media. That’s barely enough to store a handful of modern titles that can take up more than 100GB each. Thankfully, the PS5 comes with an expansion slot that lets you add an M.2 NVMe SSD to quickly expand the storage when the included SSD fills up.
Installing an M.2 SSD in a PlayStaion 5 is a fairly simple process, and it only takes a few minutes, as long as you know what you’re doing. There are a few important things to consider, though, and you may find it a bit overwhelming to dismantle some parts to find the slot. I’ve installed and swapped the SSD on my PlayStation 5 a few times now, so I decided to put together a handy guide for those who are tackling this for the first time. Here’s a step-by-step guide detailing how to install an SSD in PlayStation 5.
Finding the right SSD for PlayStation 5
Not all M.2 SSDs on the market are made equal, and the PS5 only accepts a specific kind. In fact, Sony has laid out a few requirements for compatible SSDs for the PS5, and you can check them out below.
| PCI-Express Gen4x4 supported M.2 NVMe SSD (Key M) |
| 250 GB – 8 TB |
| 2230, 2242, 2260, 2280, 22110 |
|
| 5,500MB/s or faster is recommended |
| Socket 3 (Key M) |
It’s also recommended that you install a heatsink on your SSD to tame the operating temperature. The best SSDs for PS5 come with a built-in heatsink, so you don’t have to worry about buying and installing one manually on your drive, unless you are repurposing an older drive without a heatsink. I am using an ADATA XPG Gammix S50 Lite SSD to showcase the step for this particular tutorial, and it comes with a built-in heatsink to keep the operating temperature of the drive low.
Pre-requisites
You don’t need much to get started
The only tool you would need to install an SSD inside a PlayStation 5 is a Philips head screwdriver. You’ll also need a compatible heatsink for your SSD’s size in case it doesn’t ship with one out of the box. I also recommend clearing out some space on your desk in order to lay the PlayStation on it while you’re dismantling its side panels.
Removing the side panels
A fairly straightforward process
- Lay the PS5 flat on your desk or some other flat surface, while ensuring the PlayStation 5 logo is facing down and the ports are facing you.
- Grip the upper left corner and the lower right corner of the side panel, and carefully pull up the lower-right corner while pushing the panel to the left.
- Use your left thumb to brace the top of the panel for some grip and apply some pressure to push the panel to the left while lifting the panel up with your right hand to remove it.
- Locate the metal panel covering the SSD slot and unscrew it to reveal slot.
Installing the SSD
Make sure you add a heatsink
This is the part where you insert the M.2 drive into the slot and secure it with screws. Make sure the M.2 SSD you’re installing has a heatsink. Most PS5-compatible SSDs on the market these days ship with one, so use that before inserting the drive. The XPG Gammix S50 Lite that I am using today for this particular tutorial comes with a heatsink as you can see in the image below.

Once your SSD is prepped to be inserted into the slot, simply follow the steps mentioned below to finish the installation process.
- Carefully insert the SSD into the M.2 slot by aligning the notch on the SSD with the slot.
- Secure it using the standoff and the screw that’s already pre-installed in the top screw hole.
- The drive should sit completely flat on the expansion slot once you secure it in place using the screw.
- Cover the expansion slot once again after the SSD is in place.
- Replace the side panel by placing it on top of the PS5 until the hooks align with a click, and push the panel to the right side to lock it in place with a snap.
Closing thoughts
And that’s how easy it is to install an SSD on the PS5. The PS5 will automatically detect the M.2 SSD and present you with the option to format it once you connect the PS5 back to the TV and power it on. Allow it to format the SSD to proceed, and you’ll be all set to use it in a few minutes. Your PS5 will also run a speed test to tell you how fast your drive is, and whether it’s faster than Sony’s recommendation. There are plenty of great M.2 SSDs you can buy for the PS5, and I’ll leave a link to buy one of my favorite ones below.
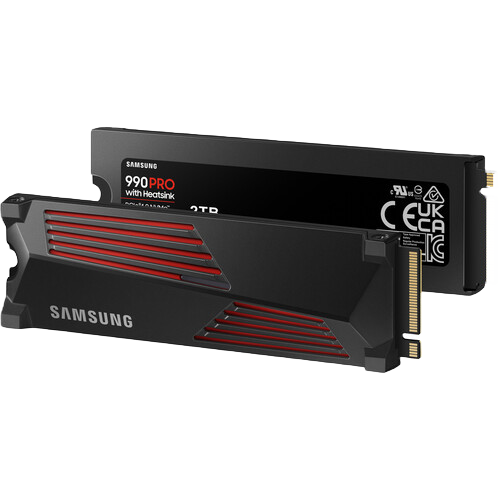
Samsung 990 Pro with Heatsink
Ultimate PS5 performance
$100 $155 Save $55
The Samsung 990 Pro is one of the most performant SSDs you can get for your PS5 with plenty of storage up to 4TB. This drive has excellent sequential read speeds at up to 7,450MB/s which is useful for keeping gaming loading times low.
** (Disclaimer: This video content is intended for educational and informational purposes only) **
More...
