
 Tweet
Tweet
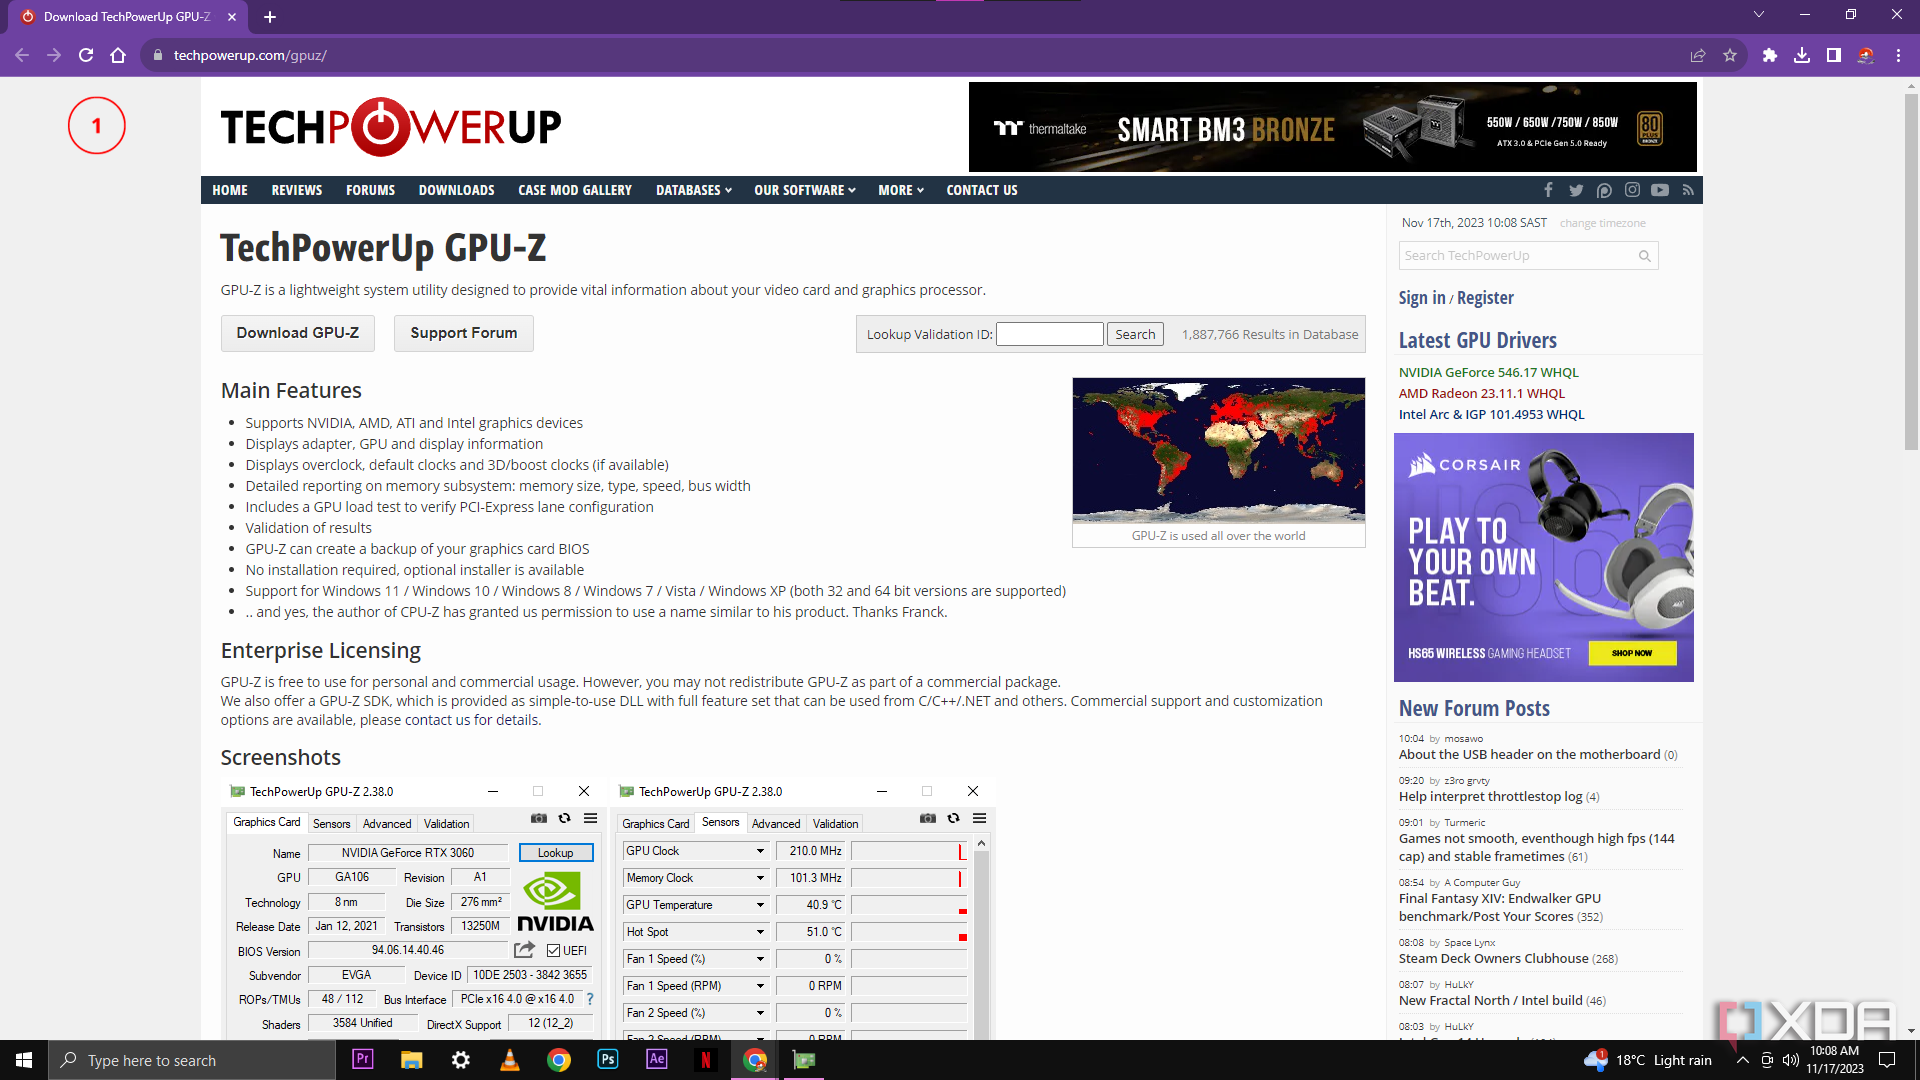
GPU-Z is a powerful software, created by TechPowerUp, that shows you information about your excellent graphics card. The software uses a database with information on every commercial graphics card available, plus a multitude of sensors to measure the performance of your graphics card, giving users information on the GPU’s name, model, VRAM, temperature, and fan speed. It even shows the voltage and wattage being used by each component. This only scratches the surface of what this software is capable of.
Why would you need to use GPU-Z?
UnsplashҠdata-modal-id=â€single-image-modal†data-modal-container-id=â€single-image-modal-container†data-img-caption=â€nullâ€>
Anybody with an expensive gaming PC should know how to identify, measure, and test their hardware’s performance. Troubleshooting and tinkering are part of owning a gaming PC, and while many people may just take their PC to a technician, it’s more than likely that those same technicians will use software similar to this to measure your hardware and look for any faults, so you could save a lot of money by looking at it yourself.
If you love opening up and working on your PC, this software will be your dream. It will let you see see every minute detail about your graphics card, validate safe overclocking specifications, and even give you the ability to upload your GPU’s settings for others to download and use.
Can you overclock your graphics card with GPU-Z?
While you can’t use the GPU-Z software to overclock any of your hardware, you can use it to monitor the changes to the hardware that you made while overclocking. This makes it an effective tool for monitoring changes in the graphics card and ensures you are not pushing the hardware too far. And while it’s not an overclocking tool in itself, there is an option for you to view other users with the same graphics card as you and copy their settings for you to use on your computer.
How to download and install GPU-Z
First, we’ll run through the steps for you to download and install the application on your PC. Once it’s installed, we’ll go through some of the important sections and things to look for in the program.
- Go to the TechPowerUp website.
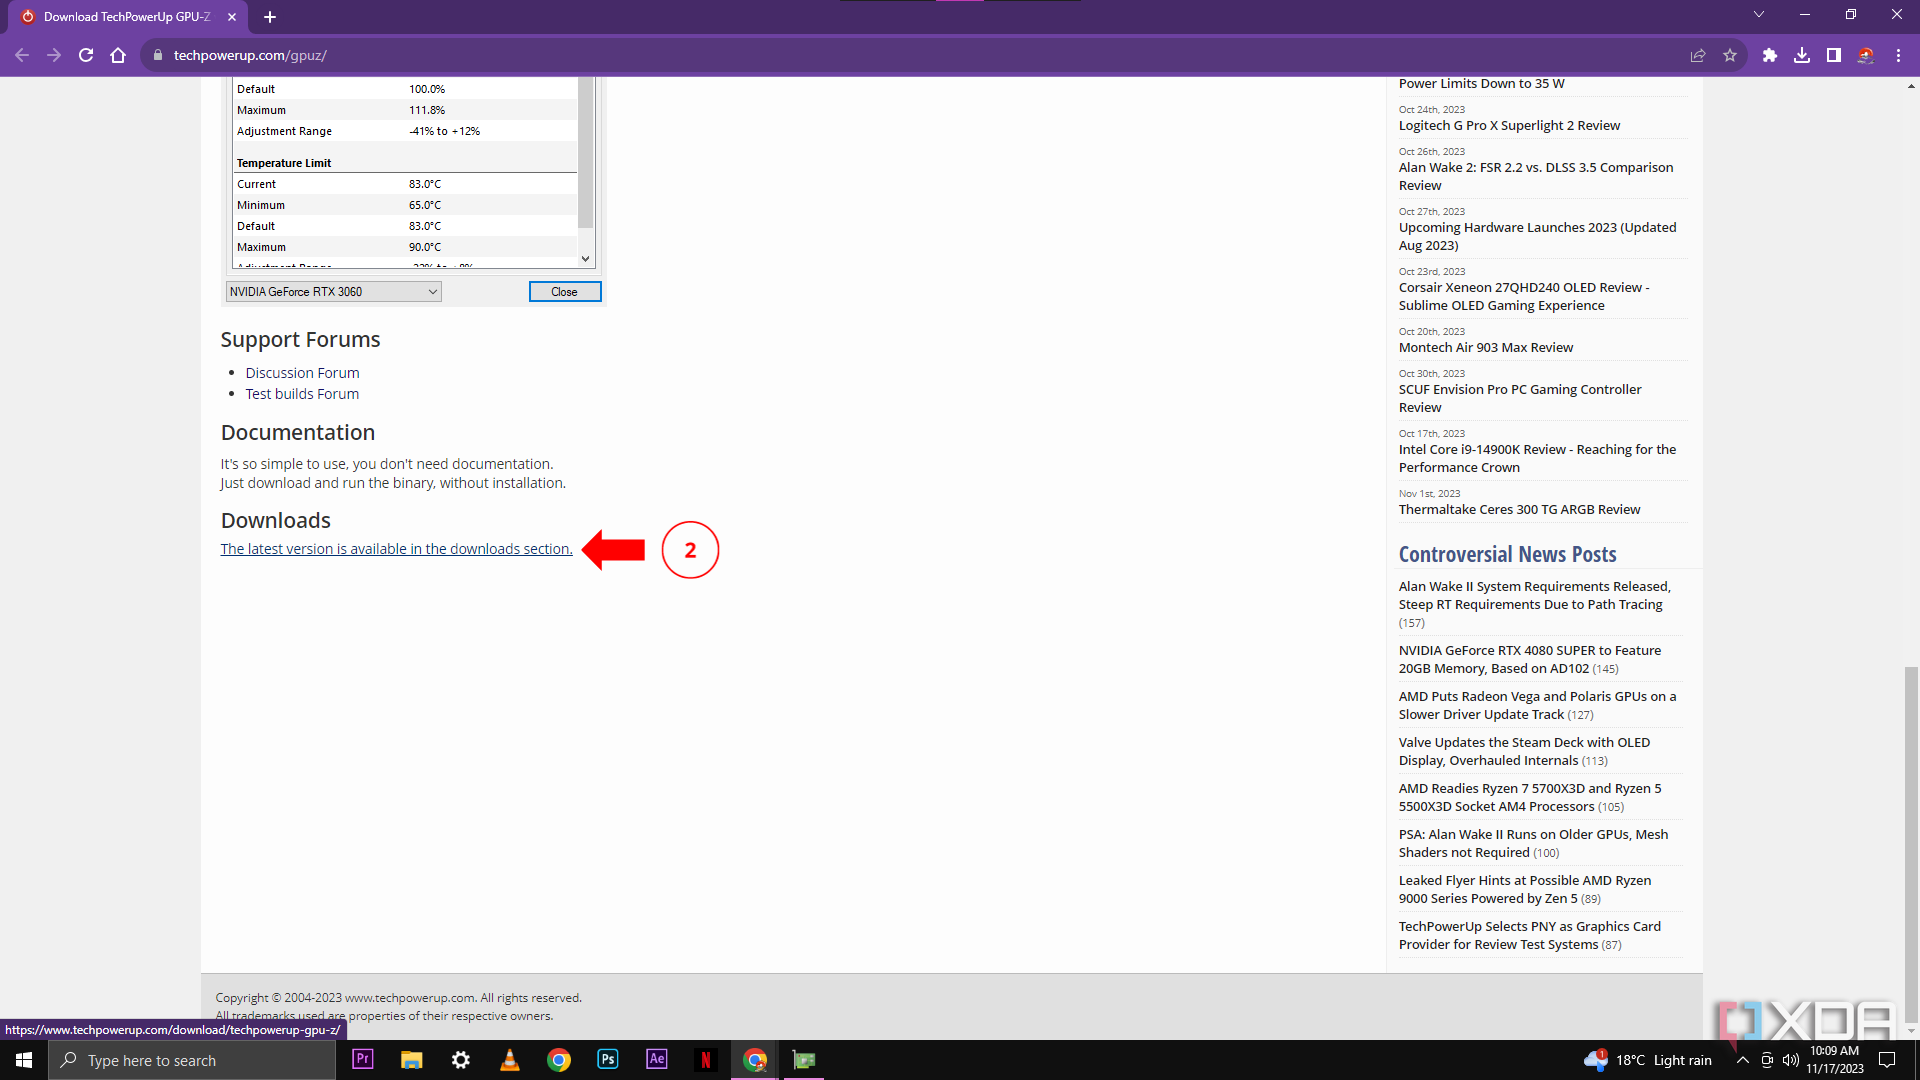
- Scroll down to the bottom of the page and click on the Downloads link.
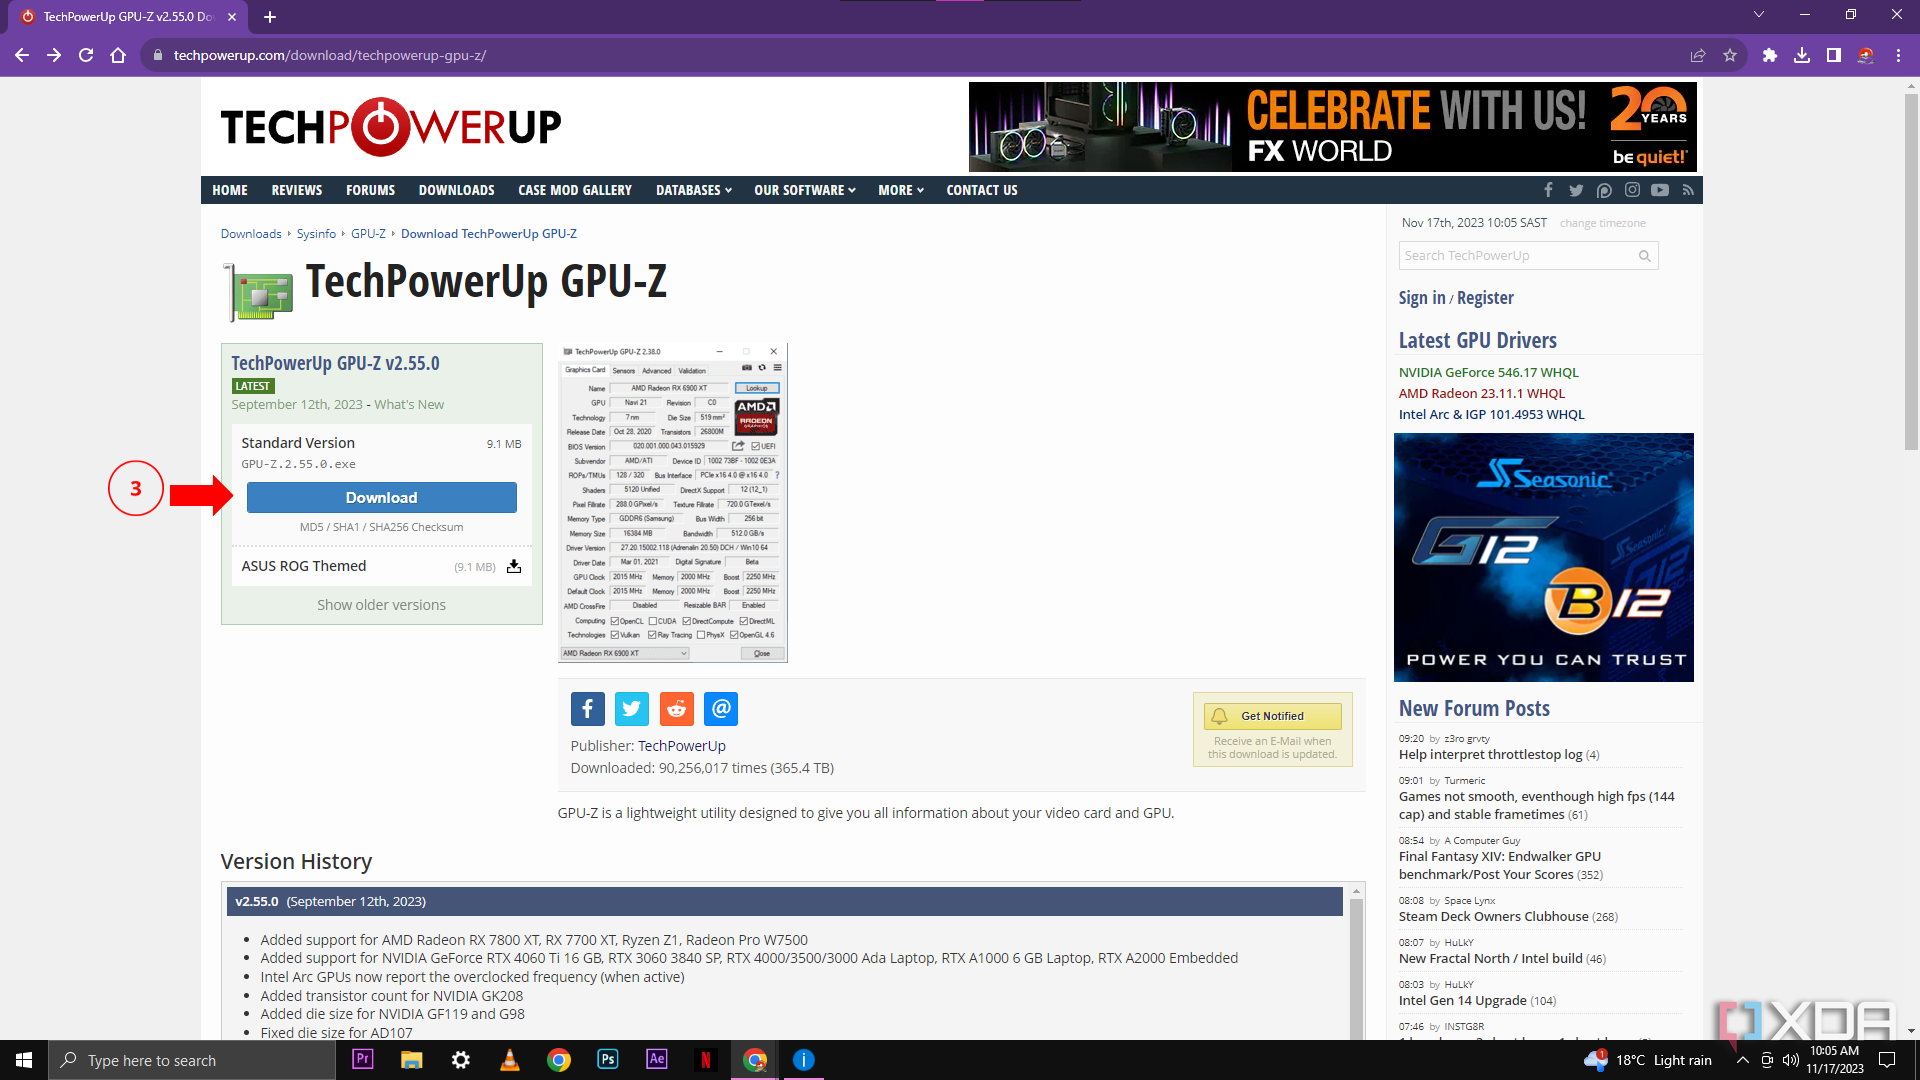
- Click on the Download button.
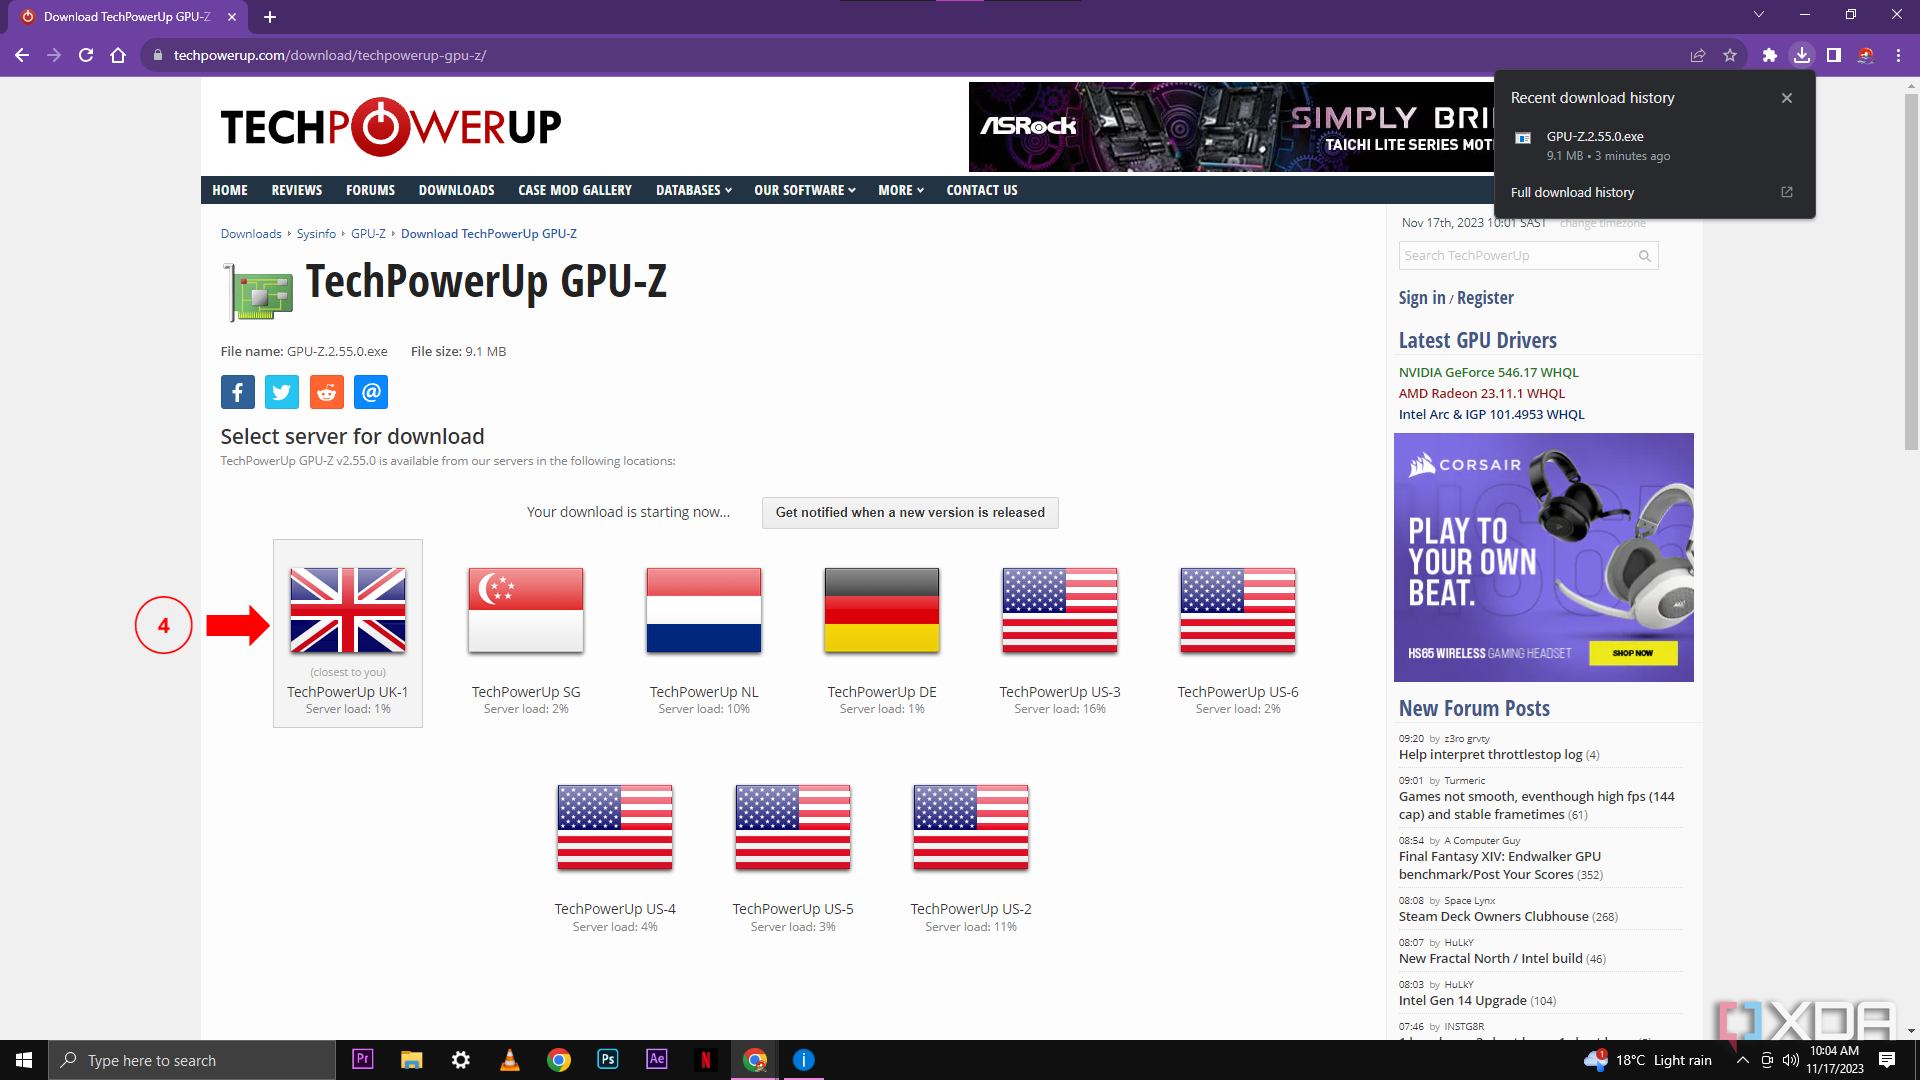
- Click on a country server that is closest to your location. (I have chosen the UK)
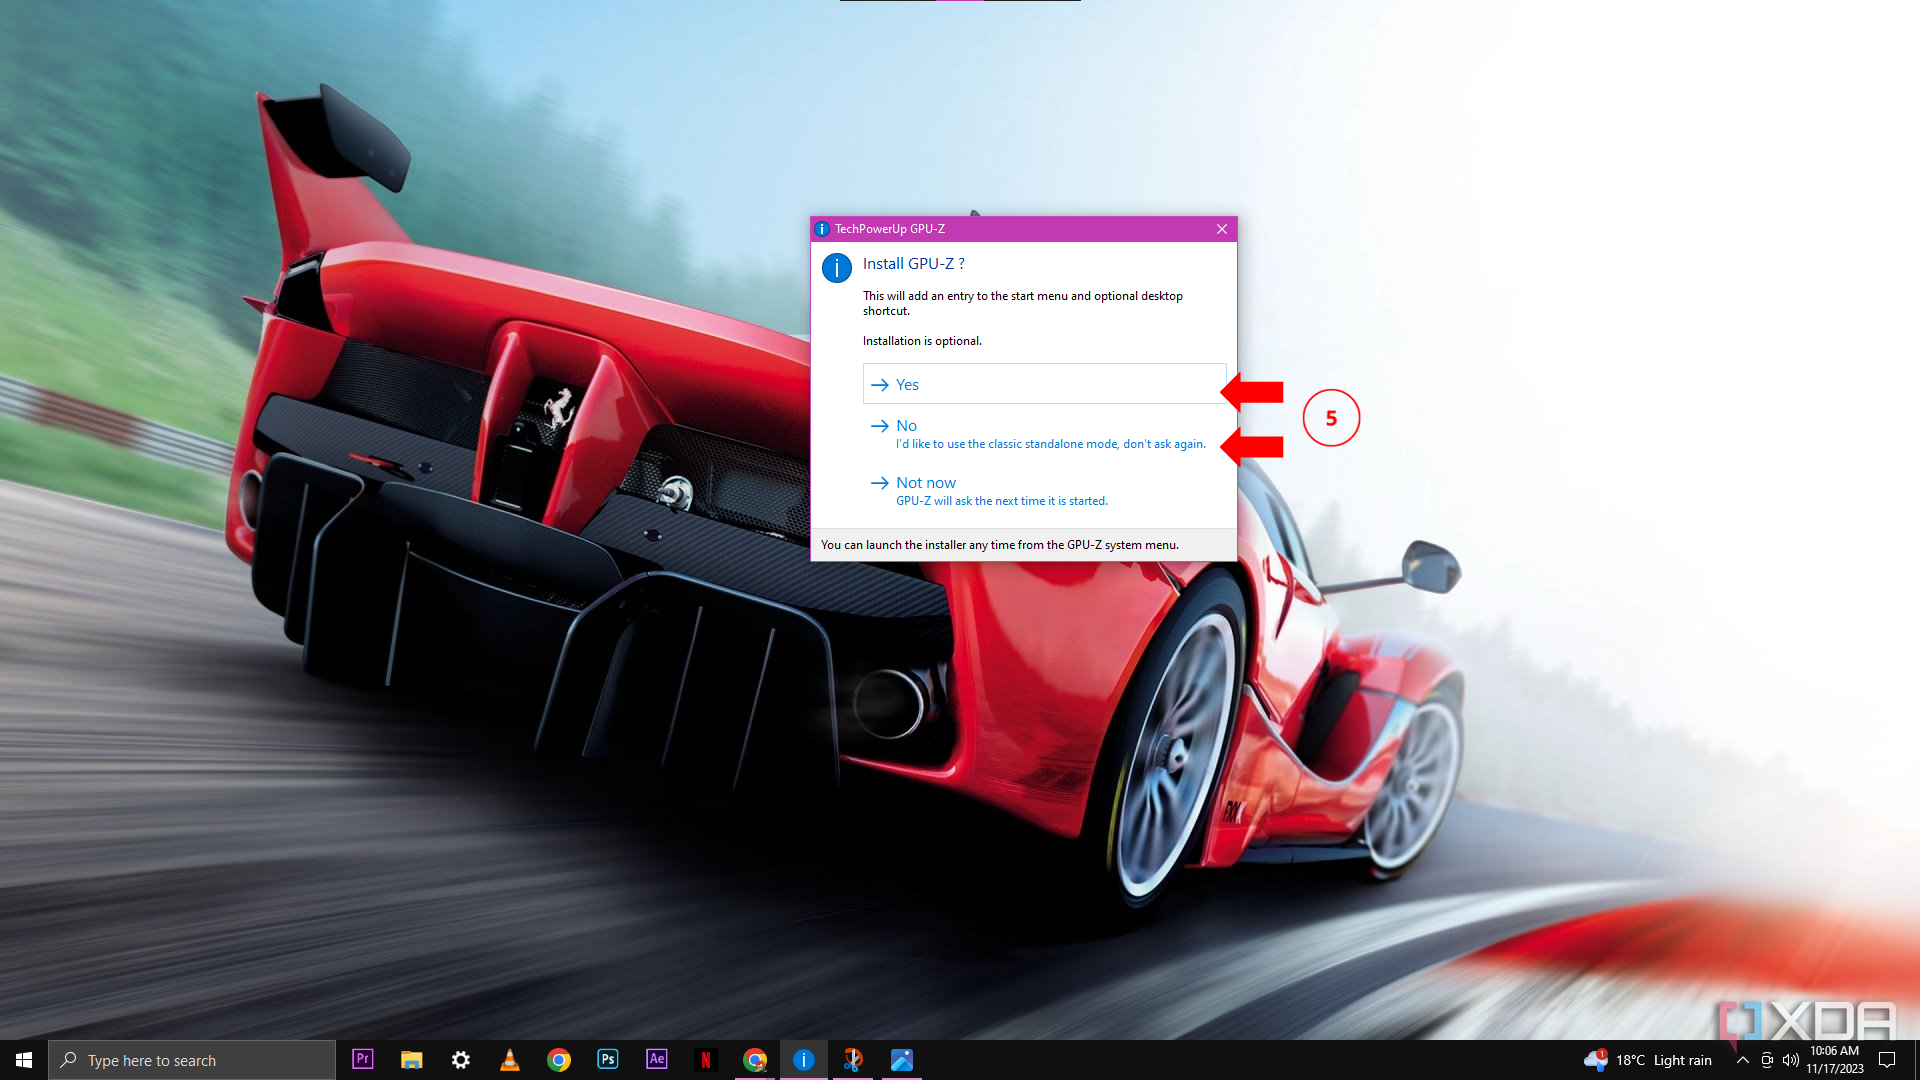
- A pop-up will appear asking if you want the application to open on start-up. For most people, this won’t be necessary, so you can select No. If you want the application to open every time you turn your computer on, then select Yes.
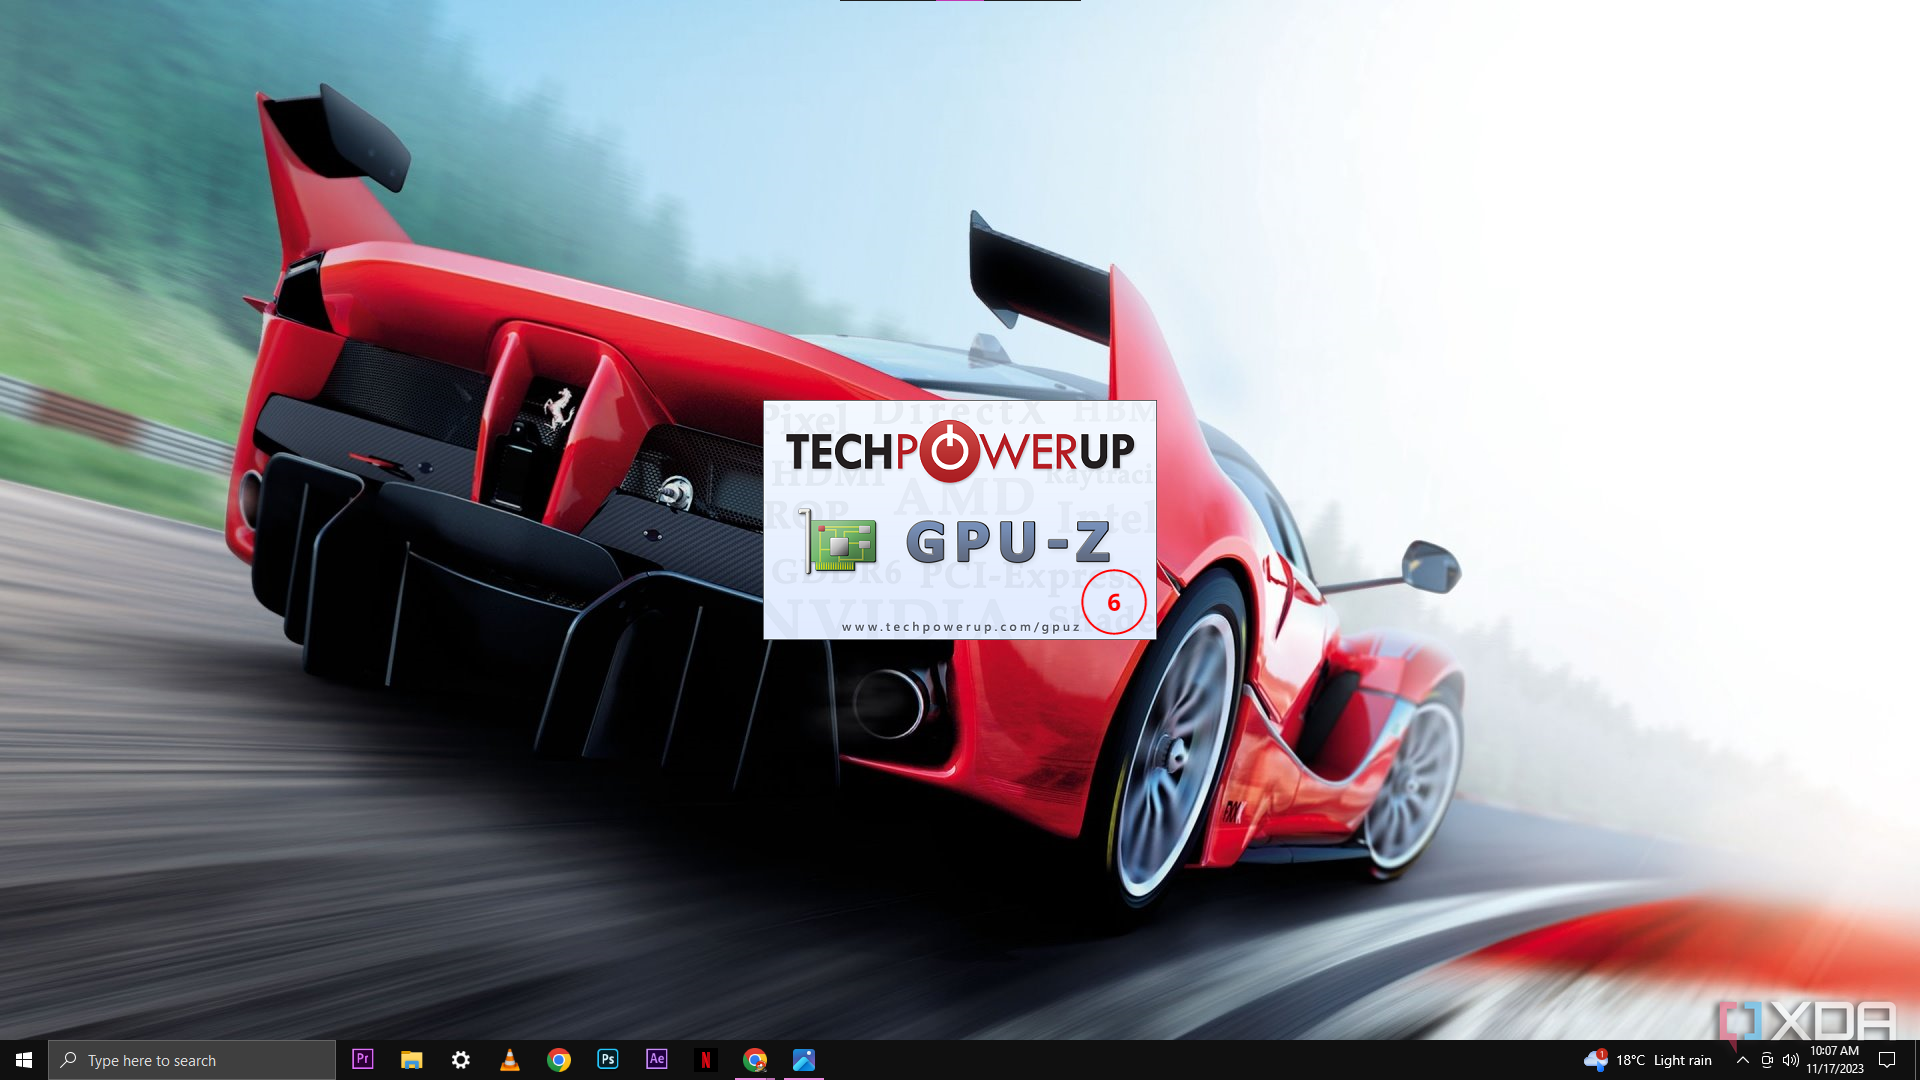
- The application will be installed quickly, and then the program will open.
Navigating the GPU-Z Interface
There are four main tabs in the GPU-Z application. We will run over the most important information in each tab. It is impossible to create a specified tutorial for this program as it is used for many different reasons, and depending on what you need it for, will decide what information you need to search for in the program.
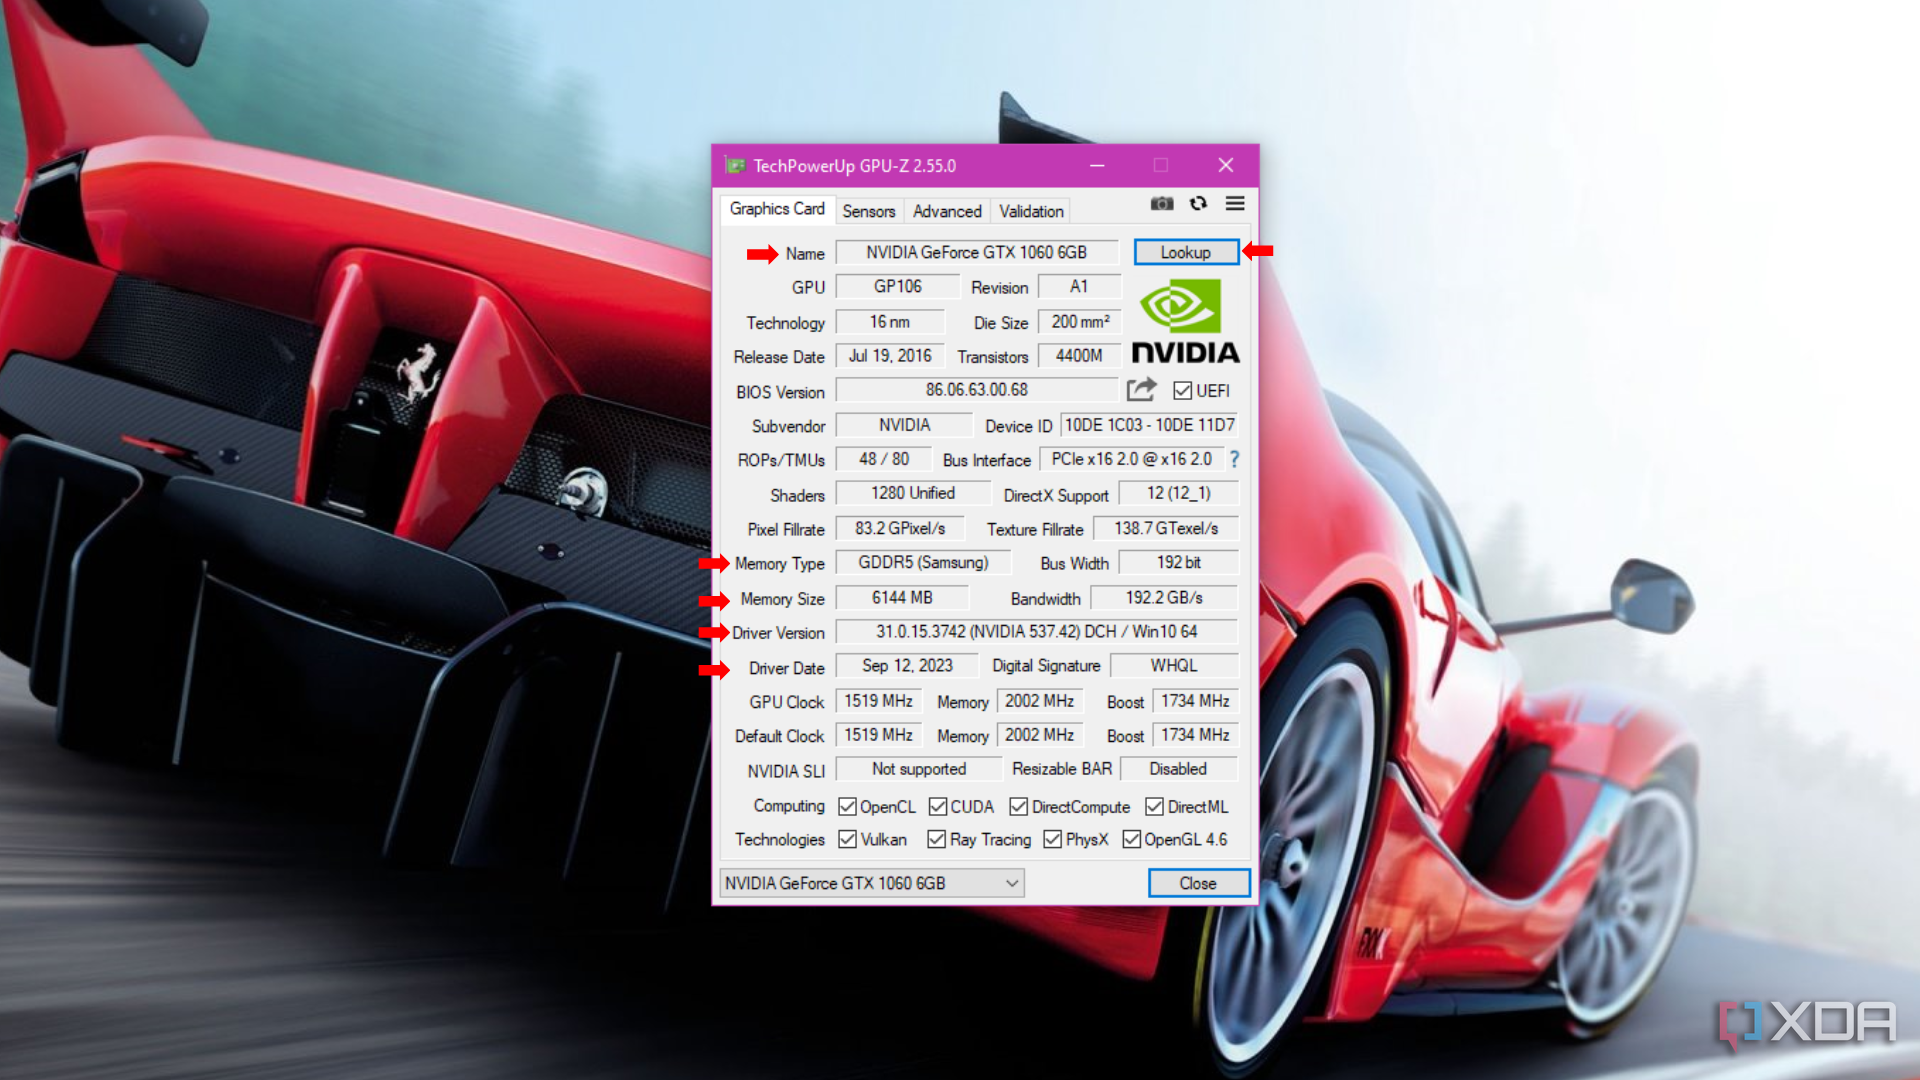
- The Graphics Card tab is the default tab that the application will open on. This tab has your graphics card’s essential information. The main sections here to pay attention to are; the Name and Lookup button for your graphics card, your GPU’s Memory Type and Memory Size, and your Driver Version and Driver Date. Use this information to check on the GPU’s manufacturer site for driver updates and additional downloads for your graphics card.
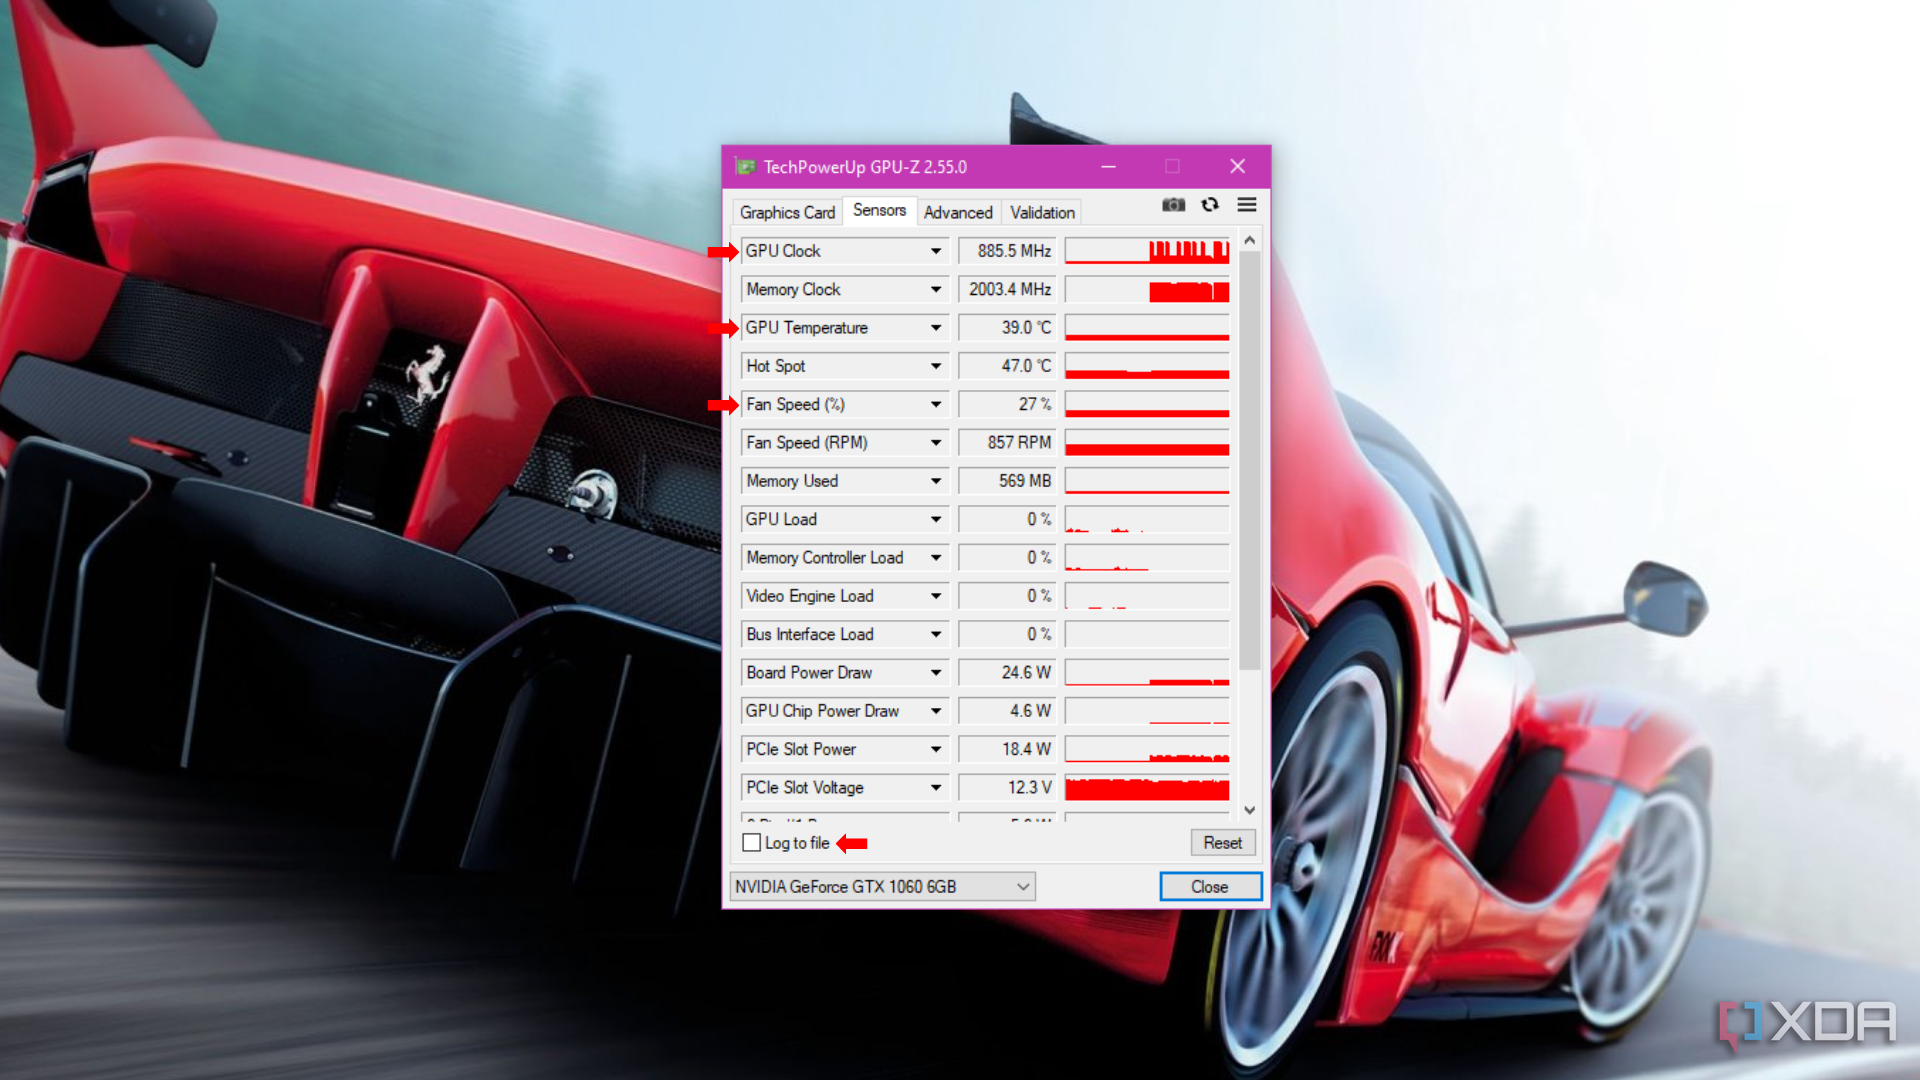
- The Sensors tab is where the program becomes very technical. This tab shows your graphics card performance in real-time. The most important information in this section is your GPU Clock, GPU Temperature, and Fan Speed. These three sections are what you will need to analyze if you want to overclock your graphics card.
- Another great feature of this section is the Log to file checkbox at the bottom of the window. This checkbox will save your GPU’s current performance as a text file that can be turned into a spreadsheet, which will easily allow you to create graphs and tables to compare with when changing settings on your graphics card.
- The Advanced tab contains a staggering amount of very specific information on graphics drivers, graphics-related programs, and performance statistics. In most cases, you will use this tab to check for compatibility or driver issues in your software or GPU itself. Using the dropdown menu (General) at the top of the window will allow you to toggle between sections that are dedicated to programs, like Direct X, Vulkan, OpenCL, and WDDM (Windows display driver model). This helps you to verify that you have the latest graphics drivers and allows you to see if the program is creating any stress on your PC. If you are using multiple graphic cards, you can toggle between them using the dropdown box in the bottom left corner of the window.

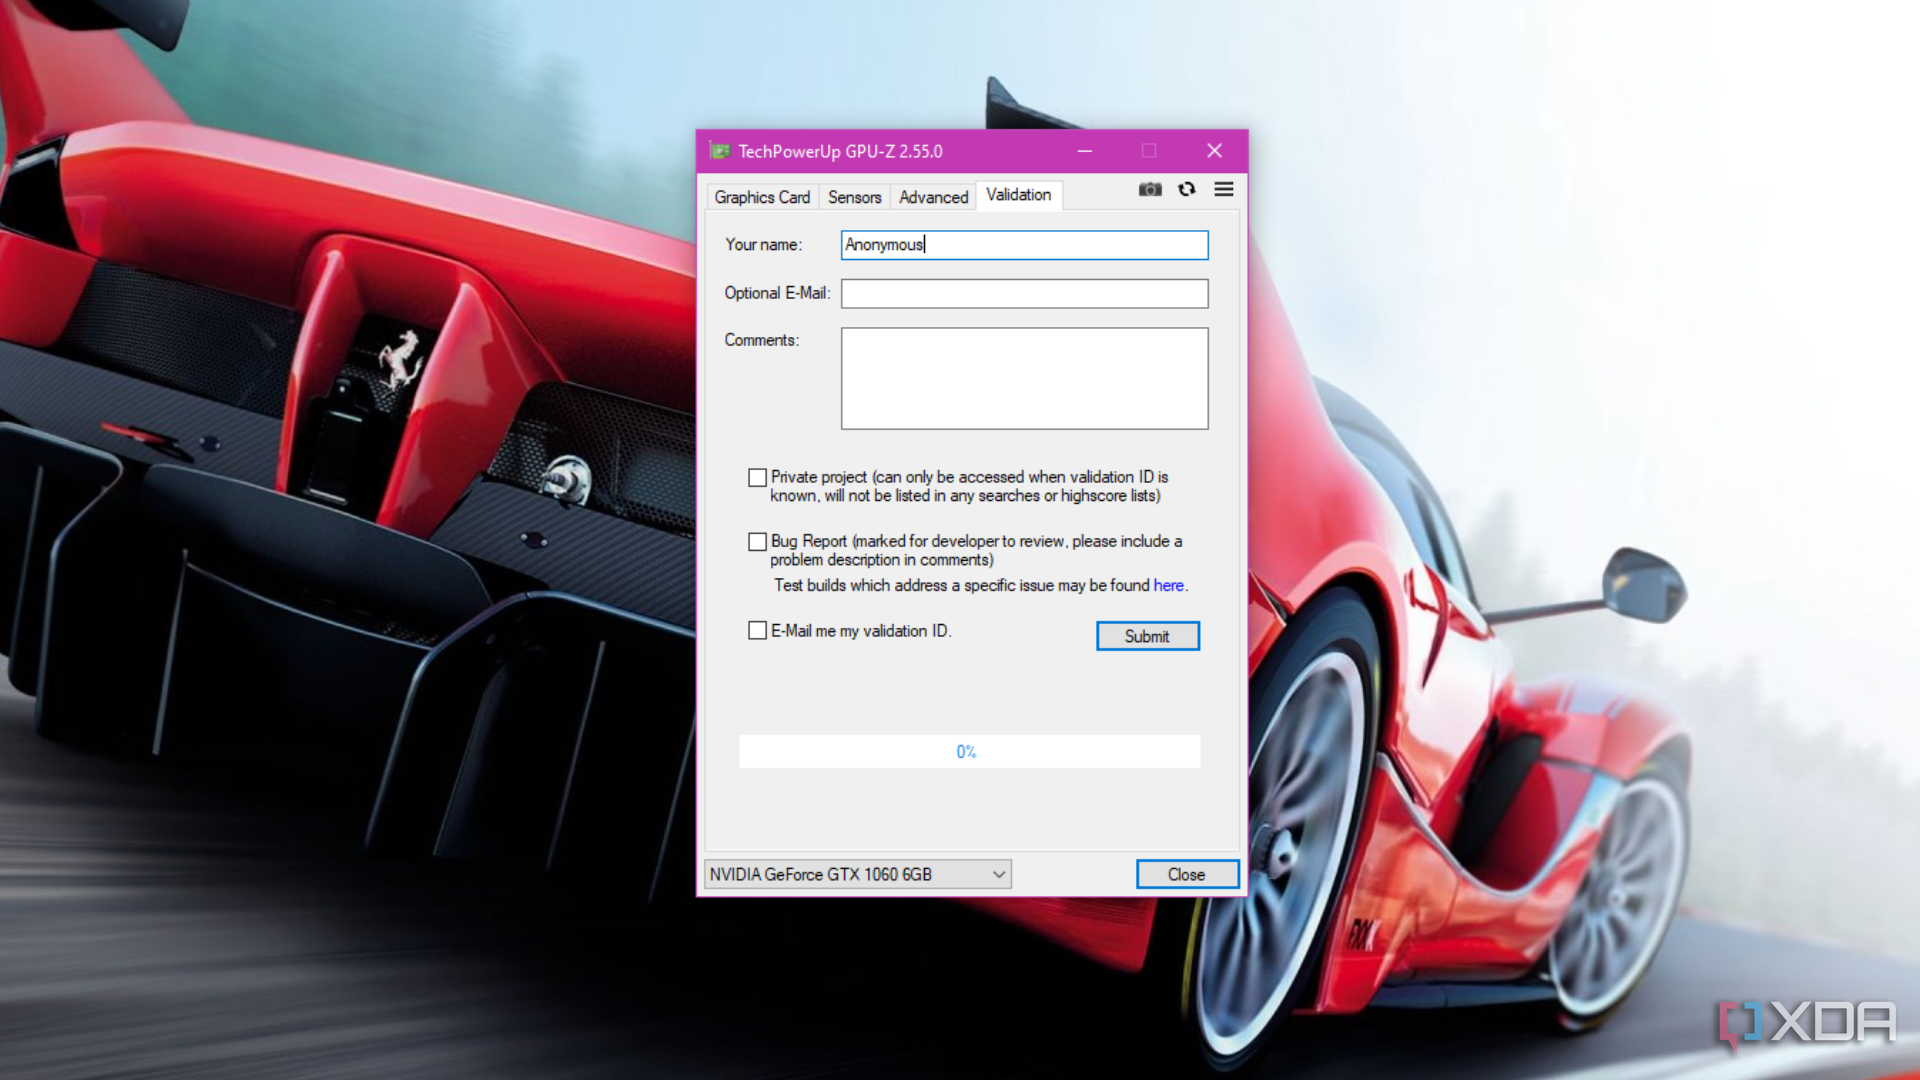
- The Validation tab is the final section of the program, and it is for users to share their GPU settings on the TechPowerUp website. If you have overclocked your GPU within safe parameters, and you use GPU-Z to record the data, you can upload your settings as a log file so that other people who use the same graphics card as you can optimize their cards by looking at submitted logs and copying the settings into their PC. This is a safe way for beginners to overclock their graphics cards without worrying that they may damage the card if they tweak the settings themselves. This section is also used to report bugs for developers to review and create fixes.
Do you need GPU-Z on your PC?
While GPU-Z is an immensely helpful tool for anyone with a gaming PC, it is not necessary for the masses. Most people will never use this application unless they are trying to fix graphical issues on their computer, mine cryptocurrency, or would like to overclock their GPU. While many computer enthusiasts would have a field day with this program, the general populace would most likely buy a new computer or take it to a technician to fix it before trying to use this program to fix it. However, if you would like to learn more about your graphics cards or computers in general, then it is recommended to download GPU-Z and take a look at your performance before you start tweaking any settings.
** (Disclaimer: This video content is intended for educational and informational purposes only) **
More...
